So this post will cover five of our breakfast staples:
- Breakfast sandwiches
- Breakfast burritos
- Bacon cheddar scones
- Baked Oatmeal bars (veggie)
- Cashew-ginger granola (veggie)
So you may notice that I don't link to a recipe for some of the foods. That is largely because what you use for these is largely your choice. Let's start with those first, and I'll share with you what I typically use.
Breakfast sandwiches
These are SUPER easy, and based off of the following recipe: http://www.homebeccanomics.com/2011/09/14/make-ahead-and-freeze-breakfast-sandwiches/
Here's what I use:
12 English muffins
12 Slices of cheese (your choice..we like pepperjack)
12 eggs
12 slices of meat (such as ham, turkey, bacon, or sausage patties)
Assemble the sandwiches minus the eggs. Assemble them on paper towels, as this is how you will freeze and reheat them.
 |
| Partially assembled sandwiches, minus the eggs. |
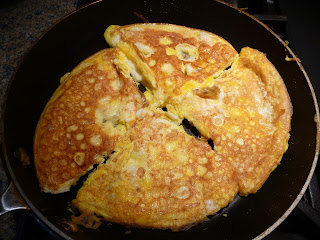
For the eggs, work with them 4 at a time. Lightly scramble the eggs with a little salt and pepper.
 |
| Working with 4 eggs at a time. |
Put them in a hot, smallish pan. (While you're waiting for them to cook, crack 4 more eggs). Wait until the whites have start to set on the top, then slice the eggs into quarters and flip them. Cook for maybe one more minute (you can peek under the eggs with a spatula to see if they're done.
 |
| See the whites just starting to set on top? |
 |
| This is after I sliced the eggs into quarters and flipped them. |
Assemble the eggs into your sandwiches, then wrap them up in a paper towel and put them in gallon ziploc bags. To reheat, place the paper towel covered sandwich in the microwave for about 1:20. The paper towel keeps in the moisture, and even the egg reheats nicely. :-)
 |
| Sandwich assembly with eggs on top. |
 |
| Sandwich all snug in its blanket, awaiting reheating. :-) |
For our typical breakfast burritos, here is what we use:
12 eggs
1 bag of frozen, cubed hash browns (I like the O'Brien kind with peppers and onions)
1 lb. of chorizo sausage
couple of handfuls of cheese (sharp cheddar is nice)
12 large tortillas (love the sun-dried tomato wraps).
Directions are really simple... cook the hash browns until ALMOST done...add the chorizo and cook it until done. Add in the eggs, scrambling until they appear set...then throw in a few handfuls of cheese.
 |
| Aluminum foil sheets will save you a ton of time! |
 |
| Stacks of tortillas alternated with aluminum foil. |
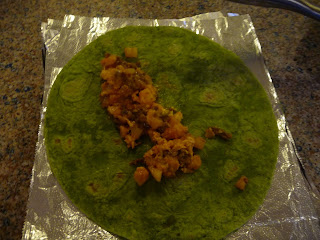
Put about half a cup of filling onto one of the tortillas, wrap 'em up, and then stick the wrapped burritos right back into the tortilla bag!
 |
| Use about a half cup of breakfast burrito filling per large wrap. |
 |
| Put the wrapped burritos right back into the tortilla bag! |
Reheating burritos is easy, but does require a few tricks. First of all, learn about the power settings on your microwave. I find that if I do 1:30 on 50% power and then flip the burrito over and do another 1:30 on the other side, I have a nicely reheated burrito. The reason I don't do full power is that the tortilla either petrifies to the plate, or the loose end of the tortilla gets too chewy. Also, reheat the burrito with the loose end on top first, then flip it over. Otherwise, the loose end gets twice the heating down next to the plate as it flops open. :-)
Bacon Cheddar Scones
If you've never made scones, you're missing out, and they're super easy to do. Furthermore, you can make sweet or savory scones.
A foolproof recipe can be found here: http://www.annies-eats.com/2010/04/08/bacon-cheddar-scones/
Let me walk you through a few pointers. First of all: BACON. It's tasty, and...it's messy. If you've never baked your bacon in the oven, man, you are missing out on a way to make bacon cooking pleasant. Cover some rimmed cookie sheets with heavy duty aluminum foil (makes cleanup far easier).....lay out your bacon, and cook on 400 for about 20-25 minutes.
Next, the scone dough: If you are using a stand mixer, the buttermilk step can be tricky if you don't know what you're looking for. Too much buttermilk isn't a disaster, but you'll end with denser muffins rather than fluffier scones. Pour a little bit of buttermilk in at a time until the dough pulls away from the side of the mixer bowl. There should be very few loose crumbs in the bottom, but a few is ok. Also, the dough really shouldn't stick much to your hands.
 |
| So much easier to cook large amounts of bacon for freezer cooking! |
 |
| Scone dough should just barely pull away from the side of the mixer bowl. |
Flour a clean countertop, lay your dough out, and form it into a nice circle shape by smushing it flat, and pressing against the outside edge to form the circle. Then use a knife to cut 8 equal portions.
 |
| Scones!!! |
Lay your scones on a cookie sheet, and do a quick egg wash with one egg and a few tablespoons of water. This will help them brown on the top.
 |
| Check out those finished scones! |
Baked Oatmeal Bars
So where are the sweet recipes you say? I don't have much of a sweet tooth, but these are the perfect amount of sweet and hearty.
Here is the recipe: http://www.the36thavenue.com/baked-oatmeal-bars/#_a5y_p=3535998
The recipe tells you most of what you need to know. Do spray the baking dish with canola oil....otherwise it is quite the mess. I get 16 bars out of this recipe!
 |
| Melty chocolate chips on top. Gooey oats. Yum. |
 |
| Cut into about 16 pieces and wrap in foil! |
If you have never made your own granola--it's fun, easy, and you can include all of the things you like. This is one of my favorite recipes: http://www.marthastewart.com/344897/cashew-ginger-granola
Follow the directions and spread the goo out on parchment paper on a cookie sheet. Then bake until it looks golden brown. When you take it out of the oven is when you add the ginger:
 |
| Before..... |
 |
| After, mixed with the candied ginger. |
 |
| Granola, ready for breakfast. |
